In this tutorial we will set up a simple template for progamming ST32 -Discovery baord. For this we are going to use latest Code Sourcery and Eclipse IDE. To make things simpler we are going to use ARM-based 32-bit MCU STM32F10x Standard Peripheral Library v3.5.0 that can be downloaded from ST site. Also we are going to use STM32VLDiscovery firmware package for example files. And why write our own linker, startup and make scripts.
For this we are going to use Michael Fischers example project for yagarto.
[download id=”1″]
We only need small modifications to fit our needs.
In this stage we assume that you have set up Eclipse and Code Sourcery and we can go further.
First of all create new C project in Eclipse File->New:
Enter project name, select the path where project will be stored and select Makefile project->Empty project in Project type list. In Toolchain list select Other Toolchain. This will create empty project that will run make to compile project.
Now we can start adding files. In order to avoid significant mess in project folder it is good practice to create some logical folder structure. There are no particular rules how this can be one exactly but you will find what works best for you. In my case I create two root folders Device and Libraries. Then in Device folder create two subfolders –linker and startup.
After our folders are set we need to copy source and library files that will be needed for our project. First of all we import linker scripts. Import stm32f103xb_flash.ld andstm32f103xb_ram.ld files to Device/linker folder from STM32Test/prj. Open each of them and edit memory configuration to fit your board like this
MEMORY

{
    FLASH (rx)  : ORIGIN = 0x08000000, LENGTH = 128K
    RAM   (rwx) : ORIGIN = 0x20000000, LENGTH = 8K
}
Next step is to import startup code. Now we import crt.c andvectors_stm32f10x_md.c files in to Device/startup directory from STM32Test/src. These are more general and well commented comparing to our earlier discussed. We don’t have edit anything here as startup files are ready for medium level arm cortex-m3 devices.
Now we have to import necessary libraries in to our project. These will be CMSIS and STM32Discovery specific. Import latest CMSIS library from downloaded Standard Peripheral Library in to Libraries folder. This library includes core support library and device support libraries. This is where register definitions are made, system level initializations and standardized access to processor features (Probably we will need to make separate post about CMSIS). From same location import STM32F10x_StdPeriph_Driver package where all peripheral access drivers are stored. Then import STM32Discovery board specific library from downloaded STM32VLDiscovery firmware package. It lies in an3268\stm32vldiscovery_package\Utilities folder. So import whole Utilities folder in to projects Library folder. We sould have following view in project explorer:
We have set up the base. Now all we need is a main program and makefile. stm32vldiscovery_package has a set of code examples. So we are going to use one. So import source files in to root project folder from an3268\stm32vldiscovery_package\Project\Examples\GPIOToggle:
import only files.
Last thing to do is to create makefile. I used make file from STM32Test package and slightly modified to comply with project directories and also added size function to display memories used on target. So Create new blank Makefile in project root folder and copy following contents to it:
#

#       !!!! Do NOT edit this makefile with an editor which replace tabs by spaces !!!!
#
##############################################################################################
#
# On command line:
#
# make all = Create project
#
# make clean = Clean project files.
#
# To rebuild project do "make clean" and "make all".
#

##############################################################################################
# Start of default section
#

TRGT = arm-none-eabi-
CC   = $(TRGT)gcc
CP   = $(TRGT)objcopy
AS   = $(TRGT)gcc -x assembler-with-cpp
BIN  = $(CP) -O ihex

MCU  = cortex-m3

# List all default C defines here, like -D_DEBUG=1
DDEFS = -DSTM32F10X_MD_VL -DUSE_STDPERIPH_DRIVER
# List all default ASM defines here, like -D_DEBUG=1
DADEFS =

# List all default directories to look for include files here
DINCDIR =

# List the default directory to look for the libraries here
DLIBDIR =

# List all default libraries here
DLIBS =

#
# End of default section
##############################################################################################

##############################################################################################
# Start of user section
#

#
# Define project name and Ram/Flash mode here
PROJECT        = main
RUN_FROM_FLASH = 1

# List all user C define here, like -D_DEBUG=1
UDEFS =

# Define ASM defines here
UADEFS =

# List C source files here
LIBSDIR    = ./Libraries
CORELIBDIR = $(LIBSDIR)/CMSIS/CM3/CoreSupport
DEVDIR  = $(LIBSDIR)/CMSIS/CM3/DeviceSupport/ST/STM32F10x
STMSPDDIR    = $(LIBSDIR)/STM32F10x_StdPeriph_Driver
STMSPSRCDDIR = $(STMSPDDIR)/src
STMSPINCDDIR = $(STMSPDDIR)/inc
DISCOVERY    = $(LIBSDIR)/Utilities
DEVICE       = ./Device
STARTUP      = $(DEVICE)/startup
LINKER       = $(DEVICE)/linker
SRC  = main.c
SRC += $(CORELIBDIR)/core_cm3.c
SRC += $(DEVDIR)/system_stm32f10x.c
SRC += $(STARTUP)/crt.c
SRC += $(STARTUP)/vectors_stm32f10x_md.c
SRC += $(DISCOVERY)/STM32vldiscovery.c
## used parts of the STM-Library
#SRC += $(STMSPSRCDDIR)/stm32f10x_usart.c
#SRC += $(STMSPSRCDDIR)/stm32f10x_flash.c
SRC  += $(STMSPSRCDDIR)/stm32f10x_gpio.c
SRC  += $(STMSPSRCDDIR)/stm32f10x_rcc.c
#SRC += $(STMSPSRCDDIR)/stm32f10x_spi.c
#SRC += $(STMSPSRCDDIR)/stm32f10x_rtc.c
#SRC += $(STMSPSRCDDIR)/stm32f10x_bkp.c
#SRC += $(STMSPSRCDDIR)/stm32f10x_pwr.c
#SRC += $(STMSPSRCDDIR)/stm32f10x_dma.c
#SRC += $(STMSPSRCDDIR)/stm32f10x_tim.c
SRC += $(STMSPSRCDDIR)/stm32f10x_exti.c
SRC += $(STMSPSRCDDIR)/misc.c

# List ASM source files here
ASRC =

# List all user directories here
UINCDIR = $(CORELIBDIR) \
          $(DEVDIR) \
          $(STMSPINCDDIR) \
          $(DISCOVERY)
# List the user directory to look for the libraries here
ULIBDIR =

# List all user libraries here
ULIBS =

# Define optimisation level here
OPT = -Os

#
# End of user defines
##############################################################################################
#
# Define linker script file here
#
ifeq ($(RUN_FROM_FLASH), 0)
LDSCRIPT = $(LINKER)/stm32f103xb_ram.ld
FULL_PRJ = $(PROJECT)_ram
else
LDSCRIPT = $(LINKER)/stm32f103xb_flash.ld
FULL_PRJ = $(PROJECT)_rom
endif

INCDIR  = $(patsubst %,-I%,$(DINCDIR) $(UINCDIR))
LIBDIR  = $(patsubst %,-L%,$(DLIBDIR) $(ULIBDIR))

ifeq ($(RUN_FROM_FLASH), 0)
DEFS    = $(DDEFS) $(UDEFS) -DRUN_FROM_FLASH=0 -DVECT_TAB_SRAM
else
DEFS    = $(DDEFS) $(UDEFS) -DRUN_FROM_FLASH=1
endif

ADEFS   = $(DADEFS) $(UADEFS)
OBJS    = $(ASRC:.s=.o) $(SRC:.c=.o)
LIBS    = $(DLIBS) $(ULIBS)
MCFLAGS = -mcpu=$(MCU)

ASFLAGS = $(MCFLAGS) -g -gdwarf-2 -Wa,-amhls=$(/dev/null) $(wildcard .dep/*)

# *** EOF ***
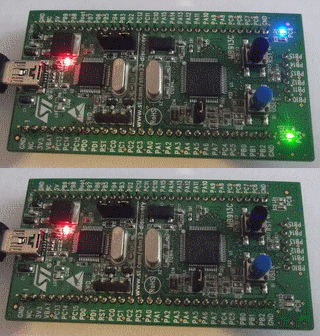
Now you’re all set. Build project and upload .hex file to Discovery board. You should see blinking LEDs.
Same way other examples can be compiled and used.
Download project files here:
[download id=”2″]


